When you use a VPN, the goal is clear: keep your online activity private and secure. But sometimes, despite having a VPN active, your DNS requests leak out. This can reveal which websites you visit, exposing your browsing habits. DNS leaks undermine your privacy, even with a VPN running. Fortunately, understanding how to prevent these leaks naturally is straightforward. With some simple steps, you can ensure your DNS queries stay encrypted and your identity remains protected.
Preventing DNS leaks is essential for online privacy. You can do this naturally by choosing the right VPN, configuring your device properly, and regularly testing for leaks. These steps help keep your browsing activities hidden from prying eyes without complicated tools.
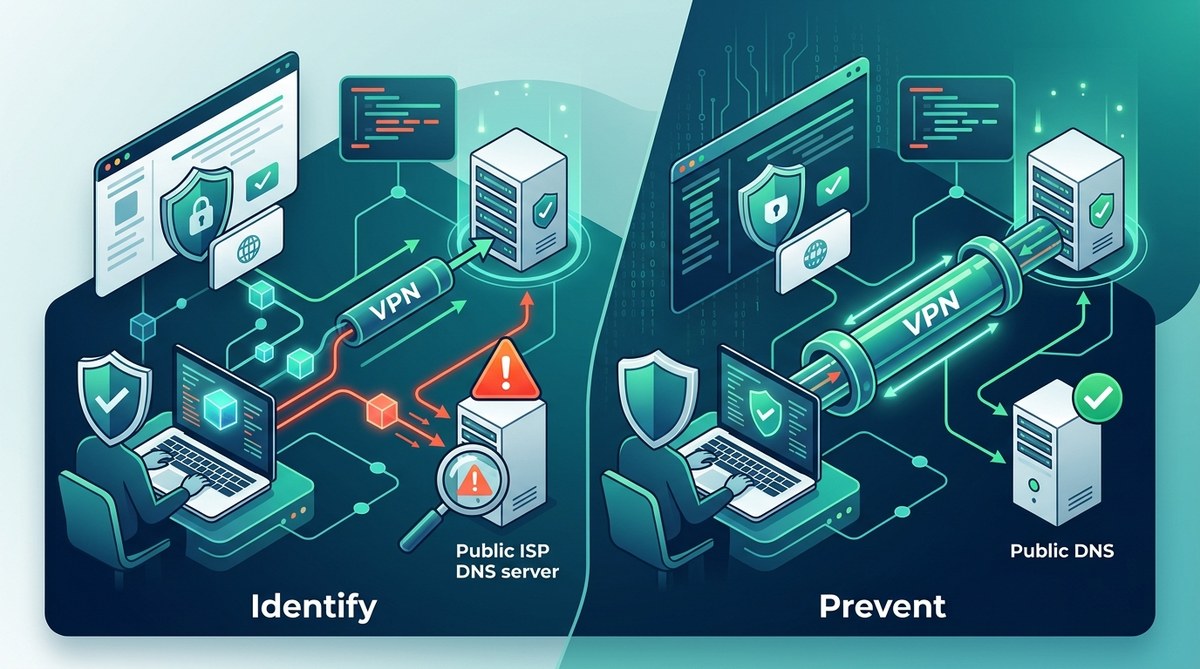
Understanding DNS leaks and why they threaten your privacy
DNS, or Domain Name System, acts like the internet’s phonebook. When you type a website into your browser, DNS translates that name into an IP address so your device can connect. Normally, DNS requests go through your VPN when it is active. However, if your device bypasses the VPN and sends DNS queries directly to your ISP’s servers, it creates a DNS leak. This leak exposes your browsing activity.
A DNS leak occurs when your system doesn’t route DNS requests securely through the VPN. It can happen due to misconfigured settings, IPv6 compatibility issues, or using unreliable VPN services. For privacy-conscious users, leaks are a serious concern because they reveal your online destinations to outsiders, including your internet service provider or potential hackers.
“The key to staying private is ensuring all DNS requests go through your VPN’s encrypted tunnel. Any bypass is a leak, and leaks are a privacy risk.” — Privacy expert
How to prevent VPN DNS leaks naturally
Preventing DNS leaks naturally involves a combination of proper setup and ongoing testing. Here are practical steps:
1. Use a VPN with built-in DNS leak protection
Choose a VPN that offers DNS leak protection as a standard feature. Many reputable providers automatically route DNS requests through their own servers, preventing leaks. When selecting a service, check their documentation or support pages for confirmation of this feature. It’s better to trust a VPN that has a proven track record in safeguarding DNS privacy.
2. Configure your device and VPN settings properly
Proper configuration is essential. Follow these steps:
- Enable DNS leak protection in your VPN app: Most VPNs have an option to block DNS leaks. Turn it on.
- Use the VPN’s DNS servers: Avoid using your ISP’s DNS. Instead, set your device to use the VPN’s DNS servers, which are often listed in the VPN’s settings.
- Disable IPv6 if not supported: IPv6 can cause leaks if your VPN doesn’t support it. Turn off IPv6 in your network settings to prevent this.
- Activate the VPN’s kill switch: This feature disconnects your internet if the VPN drops, preventing accidental leaks. Set up the kill switch through your VPN app or device network settings.
3. Manually set your DNS servers to trusted providers
If your VPN doesn’t handle DNS automatically, you can manually configure your DNS to trusted providers like Cloudflare or Google. For example, set your DNS servers to:
| Provider | DNS Server addresses |
|---|---|
| Cloudflare | 1.1.1.1 and 1.0.0.1 |
| 8.8.8.8 and 8.8.4.4 |
Make sure to update your network settings accordingly and disable any DNS options that point to your ISP.
4. Regularly test for DNS leaks
Frequent testing confirms your setup remains leak-proof. Use reliable online tools like DNSLeakTest or ipleak.net. Conduct tests:
- After configuring your VPN
- When switching networks
- After system updates
If tests show your DNS requests going to your ISP or other third parties, revisit your settings.
Common mistakes that lead to DNS leaks
| Mistake | Explanation | How to avoid |
|---|---|---|
| Using default DNS settings | Default DNS may bypass the VPN | Manually set trusted DNS servers |
| Forgetting to disable IPv6 | IPv6 can leak if unsupported | Turn off IPv6 in network settings |
| Not enabling DNS leak protection | Some VPNs don’t block leaks by default | Enable in VPN app options |
| Using free or unreliable VPNs | They may lack leak protection | Choose reputable providers |
Practical techniques for leak prevention
- Always opt for VPNs with DNS leak protection. Check reviews and support documentation.
- Configure your device’s network settings to use trusted DNS servers.
- Turn off IPv6 if your VPN doesn’t support it.
- Use a kill switch to cut internet access if VPN disconnects unexpectedly.
- Run regular leak tests after every major change or update.
How to fix DNS leaks when they happen
If tests reveal leaks, address them with these steps:
- Switch to a different DNS provider in your settings.
- Enable or reconfigure your VPN’s DNS leak protection.
- Disable IPv6 if necessary.
- Update your VPN app or consider switching to a more reliable service.
“Proactively testing your DNS setup is the best way to catch leaks early. Fix leaks immediately to preserve your privacy.” — Security analyst
Techniques versus mistakes in DNS leak prevention
| Technique | Mistake | Description |
|---|---|---|
| Using VPN with leak protection | Relying on default settings | Many users forget to enable or choose the right options |
| Manual DNS configuration | Ignoring IPv6 settings | Not disabling IPv6 can cause leaks |
| Regular leak testing | Neglecting updates | Failing to test after updates or network changes |
| Activating kill switch | Forgetting to enable it | Without it, leaks can occur if VPN drops |
How to maintain your online privacy naturally
- Choose trusted VPN providers with a reputation for DNS leak protection.
- Configure your device settings to use secure DNS servers.
- Always turn on your VPN’s leak protection features.
- Disable IPv6 if your VPN does not support it.
- Run routine leak tests to verify your privacy is intact.
- Keep your VPN and system updated for the latest security enhancements.
Final tips for a leak-proof browsing experience
Staying private requires ongoing vigilance. Regularly check for leaks, update your VPN software, and review your DNS settings. Remember, the most effective protection is built on a combination of a trustworthy VPN, proper configuration, and consistent testing. By following these natural methods, you minimize the risk of DNS leaks and keep your browsing habits confidential.
Securing your privacy with simple, natural steps
Your online privacy is only as strong as your last configuration. With a few straightforward adjustments and routine checks, you can significantly reduce the chance of DNS leaks. Keep your VPN updated, disable IPv6 if necessary, and regularly test your connection. These natural measures are effective and easy to maintain, helping you stay secure without relying on complex solutions.
“Prevention begins with awareness and proper setup. Make DNS leak protection a habit, and your privacy remains intact.” — Privacy expert
By adopting these natural methods, you can enjoy the internet confidently, knowing your DNS queries are shielded from prying eyes. Take action today to verify your setup and keep your online activity truly private.