You sit down to browse the web, and something feels off. Maybe a website won’t load at work. Maybe you want to hide your IP address from trackers. Or perhaps your IT department handed you a proxy address and said “type this in.” Whatever brought you here, you need to know how to configure proxy settings in Chrome, Firefox, and Edge without breaking anything. The good news is that each browser handles proxies a little differently, and once you understand the pattern, you can switch between them in under two minutes. Let’s walk through each one.
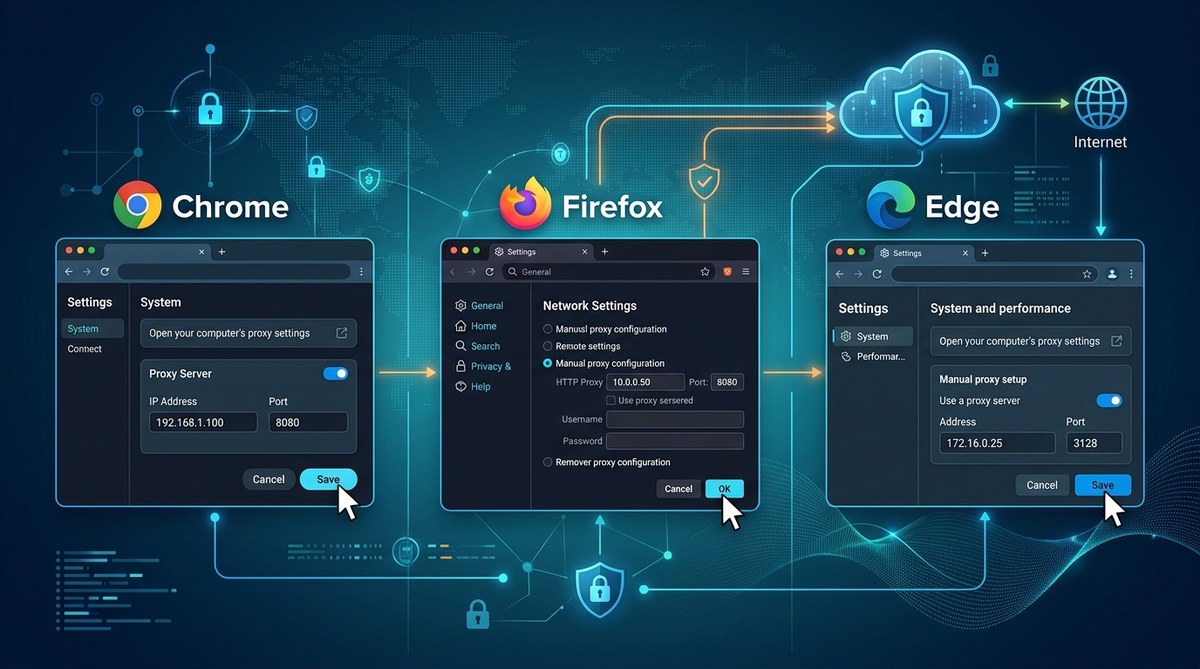
Setting up a proxy in Chrome, Firefox, and Edge is simpler than most people think. Chrome and Edge rely on your operating system’s proxy settings, while Firefox has its own separate menu. This guide covers both Windows and macOS, explains the difference between HTTP and SOCKS proxies, and warns you about the most common configuration mistakes that can leak your real IP address or break your connection entirely.
Why Bother With a Manual Proxy Setup Anyway
Before we get into the menus and checkboxes, let’s talk about why you might want to do this at all. A proxy server sits between your device and the internet. It forwards your requests and sends the responses back to you. That means the website you visit sees the proxy’s IP address instead of your home IP.
People manually configure proxies for all sorts of reasons. You might be troubleshooting a network issue at the office. You might want to access content that’s blocked in your region. Or you might be testing how a website looks from a different location. Whatever your goal, doing it manually gives you full control.
There is a catch though. A proxy does not encrypt your traffic by default. If you need encryption, you should look at a VPN instead. For a deeper look at the tradeoffs, check out our comparison of SOCKS5 proxy vs VPN.
How Chrome Handles Proxy Settings (Hint: It Uses System Settings)
Chrome does not have its own proxy configuration panel. Instead, it inherits whatever proxy settings you have set on your operating system. That means if you want to configure proxy settings in Chrome, you actually need to change your system settings. Let’s look at both Windows and macOS.
Chrome on Windows 10 and 11
- Open the Start menu and type “proxy settings.” Select the result that says “Proxy settings” under System.
- Under the “Manual proxy setup” section, toggle “Use a proxy server” to On.
- Enter the proxy IP address and port number. For example, if your proxy lives at 192.168.1.50 on port 8080, you would type “192.168.1.50” in the address field and “8080” in the port field.
- If you want to skip the proxy for certain sites, add them to the “Exceptions” list. Use a semicolon to separate multiple addresses like this: “localhost; 127.0.0.1; *.local.”
- Click Save, and Chrome will start routing traffic through your proxy immediately.
Chrome on macOS
- Open System Settings and click “Network.”
- Select your active network connection (usually Wi-Fi or Ethernet).
- Click “Details” and then scroll down to “Proxies.”
- Check the box for the protocol your proxy uses. Most of the time, that is “Web Proxy (HTTP)” or “Secure Web Proxy (HTTPS).”
- Type in the proxy server address and port number.
- Click “OK,” then “Apply,” and you are done.
Remember that any change you make here affects every application on your computer, not just Chrome. If you only want a proxy for your browser, consider using a browser extension instead.
Firefox: The Only Browser With Its Own Proxy Menu
Mozilla Firefox is different from Chrome and Edge in a way that many people appreciate. It has its own proxy settings completely independent of your operating system. That means you can have a system-level proxy for everything else and a different proxy just for Firefox. This is especially useful if you want to configure proxy settings in Firefox without affecting other apps.
Firefox on Windows and macOS (Same Steps)
- Open Firefox and click the hamburger menu in the top right corner (three horizontal lines).
- Select “Settings” from the dropdown.
- In the left sidebar, click “Network Settings.” You will find it near the bottom.
- Click the “Settings” button under “Connection.”
- You will see five options here. Choose “Manual proxy configuration” for full control.
- Enter the HTTP proxy address and port. If your proxy supports HTTPS and SOCKS as well, fill those in too.
- If you want all traffic to go through the same proxy, check the box that says “Use this proxy server for all protocols.”
- Add any domains you want to bypass the proxy in the “No proxy for” box. The default usually includes “localhost, 127.0.0.1.”
- Click “OK” to save.
There is a hidden advantage to Firefox’s approach. Because the proxy settings live inside the browser, you can run Firefox with a proxy while leaving Chrome and Edge on your normal connection. That is perfect for testing or for keeping work traffic separate from personal browsing.
Expert advice: If you choose SOCKS5 as your proxy protocol in Firefox, make sure to select “SOCKS v5” and then enable “Proxy DNS when using SOCKS v5.” This forces DNS lookups through the proxy, which prevents your ISP from seeing which sites you visit. Without this setting, your DNS requests still leak out on your real connection.
How Edge Handles Proxy Settings (Same System as Chrome)
Microsoft Edge is built on Chromium, the same foundation as Chrome. That means it behaves almost identically when it comes to proxies. Edge pulls its proxy settings from the operating system, just like Chrome does. So if you already set a system proxy for Chrome, Edge will use it automatically.
But Edge does include one extra feature that you might find helpful. You can set a per-site proxy exception list directly in the browser, separate from the system list.
Edge on Windows 10 and 11
- Open Edge and click the three-dot menu in the top right.
- Select “Settings” from the menu.
- In the left sidebar, click “Privacy, search, and services.”
- Scroll down to the “Security” section and click “Proxy setup.”
- This opens the same Windows proxy panel we used for Chrome. Toggle “Use a proxy server” to On.
- Enter your proxy address and port.
- Add any exceptions if needed, then click Save.
Edge on macOS
Because Edge on macOS also inherits system settings, you follow the exact same macOS steps from the Chrome section. Open System Settings, go to Network, select your connection, click Details, and configure the proxy under the Proxies tab.
Common Mistakes That Break Your Proxy Connection
Even experienced users sometimes mess up a proxy configuration. A single typo can make your browser useless until you fix it. Here are the most common errors and how to avoid them.
| Mistake | What Happens | How to Fix It |
|---|---|---|
| Typing http:// before the proxy address | The browser tries to resolve the URL literally and fails | Enter only the IP or hostname, no protocol prefix |
| Forgetting the port number | The browser defaults to port 80, which is often wrong | Always include the port number separated by a colon |
| Mixing up HTTP and SOCKS protocols | The proxy refuses the connection or drops packets | Check with your provider which protocol to use |
| Not adding localhost to the exception list | Your local development sites break | Add localhost and 127.0.0.1 to the bypass list |
| Leaving the proxy on after you are done | Everything feels slow because traffic is still routing through the proxy | Toggle “Use a proxy server” back to Off when you finish |
If you run into a problem where your browser suddenly cannot load any pages, turn off the proxy setting first. If the internet comes back, you know the proxy configuration is the issue. For more troubleshooting, read our guide on 7 common proxy errors and how to fix them.
When to Choose SOCKS Over HTTP Proxies
Most proxy configuration panels give you a choice between HTTP, HTTPS, and SOCKS protocols. Which one should you pick?
- HTTP proxies work well for browsing websites. They understand web traffic and can cache data to speed things up. But they only work with HTTP and HTTPS traffic, not with other protocols like email or gaming.
- HTTPS proxies add a layer of encryption between you and the proxy server. This prevents anyone on your network from seeing what you send.
- SOCKS4 and SOCKS5 proxies are lower level. They do not care what kind of traffic you send. SOCKS5 can handle web browsing, torrents, email, and even some gaming traffic. It also supports UDP and authentication.
If you are setting up a proxy for general browsing, HTTP is fine. If you want more flexibility and better privacy, go with SOCKS5. For a full walkthrough, see our guide on how to set up a SOCKS5 proxy in 5 minutes.
Testing Your Proxy to Make Sure It Works
After you configure proxy settings in Chrome, Firefox, or Edge, you should always test that the proxy is actually working. Here is a simple checklist you can run through.
- Visit a website like whatismyip.com before and after. If the IP address changes, your proxy is working.
- Check for DNS leaks by running a DNS leak test. If you see your real ISP’s DNS servers, your proxy is not routing DNS properly.
- Try a streaming site to see if your proxy is blocked. Some services block known proxy IPs.
- Load a few different websites to make sure your proxy can handle different types of traffic.
If you notice that your real IP is leaking, you might need to switch to a different proxy type or enable DNS proxying in Firefox. Leaks can also happen if your browser uses WebRTC, which can bypass the proxy. Learn more about how to test if your proxy is leaking your real IP address.
What to Do When a Site Blocks Your Proxy
Some websites actively block traffic from known proxy servers. This happens a lot with streaming platforms, banking sites, and government portals. If a site refuses to load, you have a few options.
Try switching to a residential proxy instead of a datacenter proxy. Residential proxies use IP addresses from real internet service providers, so they look like ordinary home connections. Data center proxies are easier to detect and block. Learn more in our comparison of residential vs datacenter proxies.
You can also try changing the proxy server itself. Some providers rotate IP addresses automatically, which helps you avoid blocks.
And if all else fails, you can fall back to a VPN. VPNs are harder to block because they encrypt the entire connection and hide the fact that you are using a proxy at all.
How to Turn Off Proxy Settings When You Are Done
Leaving your proxy on when you do not need it can slow down your connection and cause random errors. Here is how to disable it cleanly in each browser.
Chrome and Edge (Windows): Go back to the proxy settings panel and toggle “Use a proxy server” to Off. This removes the proxy for all system traffic.
Chrome and Edge (macOS): Go to System Settings, Network, select your connection, click Details, go to Proxies, and uncheck all the proxy protocols you enabled.
Firefox (all platforms): Open Network Settings in Firefox, select “No proxy” at the top of the connection settings window, and click OK.
That is all there is to it. Your browser will immediately go back to using your normal internet connection.
A Safer and More Private Way to Browse
Setting up a proxy manually gives you control, but it is not a complete privacy solution. Proxies do not encrypt your data, and some proxy providers log everything you do. If you care about keeping your browsing habits private from your ISP, you should consider pairing your proxy with a VPN or using a service that encrypts your traffic end to end.
We have written extensively about how to stay safe online. You might want to read about how to test your VPN for DNS, IP, and WebRTC leaks or learn about 7 privacy settings you should change on your devices today. Both of those guides complement what you have learned here and will help you build a stronger privacy setup.
Take Control of Your Browser Proxy Today
Manual configuration is one of those skills that feels intimidating until you do it once. After that, it becomes a two minute task. You now know how to configure proxy settings in Chrome, Firefox, and Edge on both Windows and macOS. You know the difference between HTTP and SOCKS proxies. You know which mistakes to avoid and how to test if your proxy is actually working. Open your browser right now and try it with a free test proxy. See the IP change with your own eyes. Once you confirm it works, you will wonder why you did not try this sooner.